Note: When adding an external data file to your project, a copy of that file is placed in your project's Data folder. This is from where the file is accessed and any changes to the file should be made to the file in this location
The default path in Windows 7 is:
C:\Users\User\Documents\Test Studio Projects\Project Name\Data
Jump to the following sections:
Excel spreadsheet
XML file
CSV file
Database source
It is important to note that the entries in the first row of the Excel spreadsheet are used as the column names when attaching columns to the inputs.
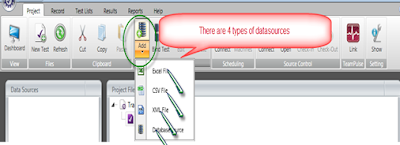
From Project tab=====èClick Add ====èselect Excel file
Enter the path to your Excel file or click the "..." button to browse and select it. Click "OK" to save this data source definition
Click ok button====èDouble Click on Test===and execute
Add an XML file
<Automationtesting>
<Inforica>
<Name>UserName</Name>
<value>sudeep</value>
</Inforica>
<Inforica>
<Name>Password</Name>
<value>inforicaHyd</value>
</Inforica>
</Automationtesting>
.

After Click ok button===And Execute
Add a CSV file
CSV files can be created in any spreadsheet application or directly in Notepad if you follow the *.csv formatting conventions (each line with comma separated values, the same number of commas in each line).
Adding a database source is different than adding an Excel spreadsheet, CSV, or XML file. When you select Database in the "Create new data source" dialog, you have a number of new options you need to specify in order to define your database connection.
- Provider - in this drop-down, select which database provider to use to access your database. The list that is displayed here depends on which providers have been installed on your computer. You should contact your database administrator if you are not sure what to select.
- Connection string - enter a valid connection string that is supplied to the selected Provider. The connection string instructs the provider the details on how to connect to your database.
- Test - click this button to test the connection to your database. A dialog indicating success will display if Test Studio makes a connection.
- Friendly Name - enter a name to represent this database connection definition
Enter the data string


